SpeechDock — Basic Features
SpeechDock makes macOS TTS/STT more flexible and accessible. While macOS includes powerful speech recognition and synthesis engines, there’s no convenient way to use them. SpeechDock fills this gap — a menu bar application that makes TTS and STT accessible from anywhere on your Mac.
It works immediately after installation with no API keys or additional downloads required.
Installation
- Download the latest
.dmgfile from the Releases page - Open the DMG file and drag SpeechDock to your Applications folder
- Launch SpeechDock from Applications
Requirements
- macOS 14.0 (Sonoma) or later
- Apple Silicon Mac (M1/M2/M3/M4)
Permissions
SpeechDock requires or recommends the following permissions:
| Permission | Level | Purpose |
|---|---|---|
| Microphone | Required | Speech recognition input |
| Accessibility | Recommended | Global keyboard shortcuts and text insertion |
| Screen Recording | Optional | System/App Audio capture, OCR, and window thumbnails |
On first launch, SpeechDock displays a permission setup window with real-time status indicators. Grant permissions in System Settings > Privacy & Security — the setup window updates automatically without restarting the app. Features that require missing permissions are disabled in the UI with clear visual indicators.
Speech-to-Text (STT)
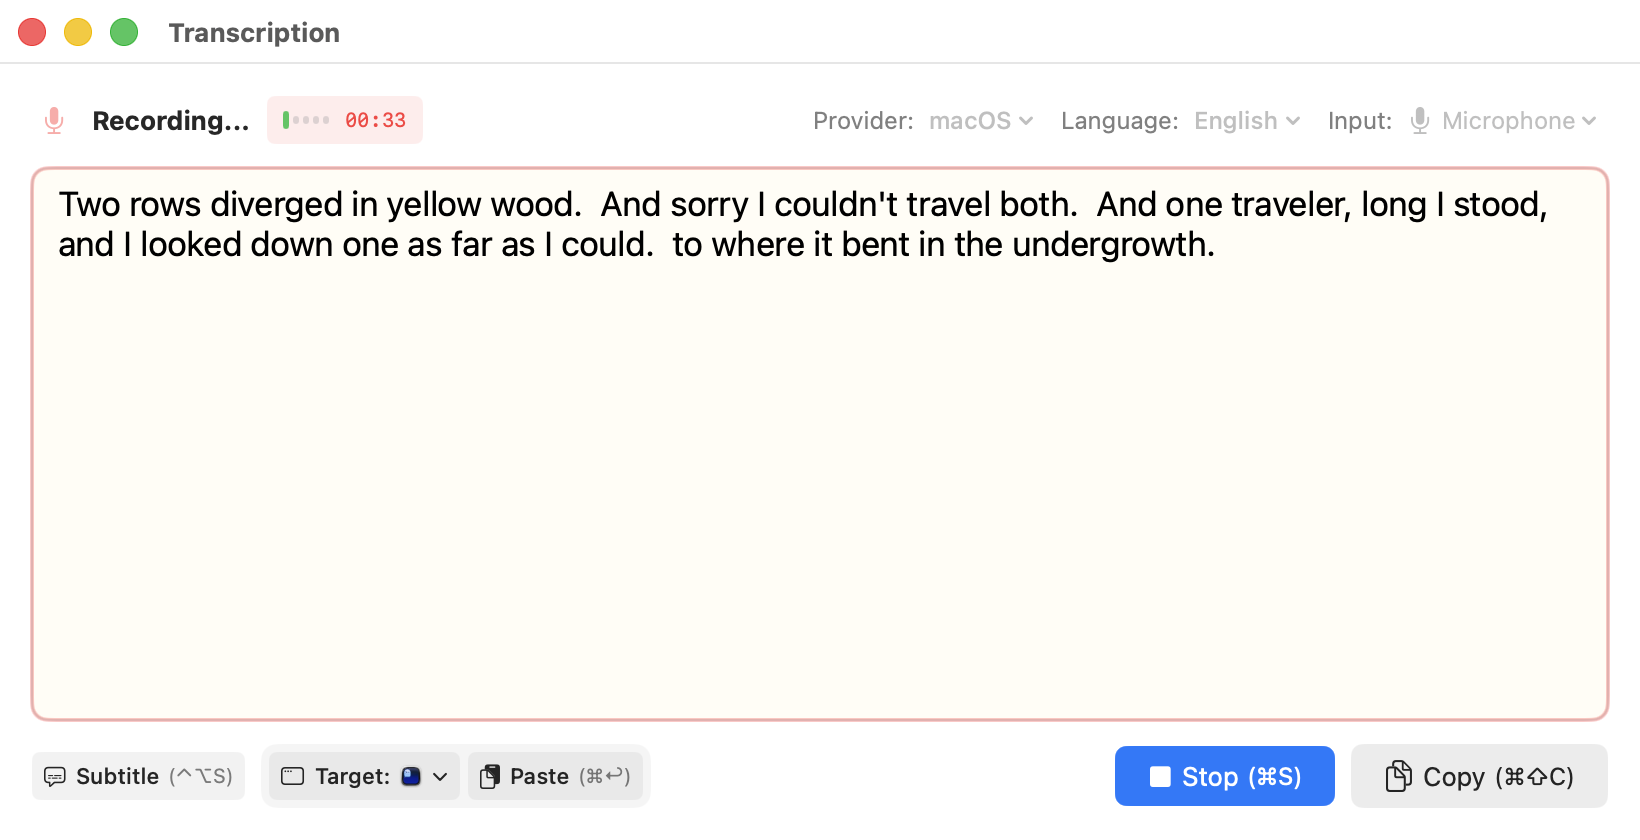
Convert speech to text using the built-in macOS speech recognition engine. No API keys required.
- On macOS 14–15: Uses Apple’s SFSpeechRecognizer (auto-restarts at 60-second intervals)
- On macOS 26+: Uses SpeechAnalyzer framework (no time limits, improved accuracy)
Audio Sources
| Source | Description | Requirement |
|---|---|---|
| Microphone | Record from any connected microphone | Microphone permission |
| System Audio | Capture all audio output from your Mac | Screen Recording permission |
| App Audio | Capture audio from a specific application | Screen Recording permission |
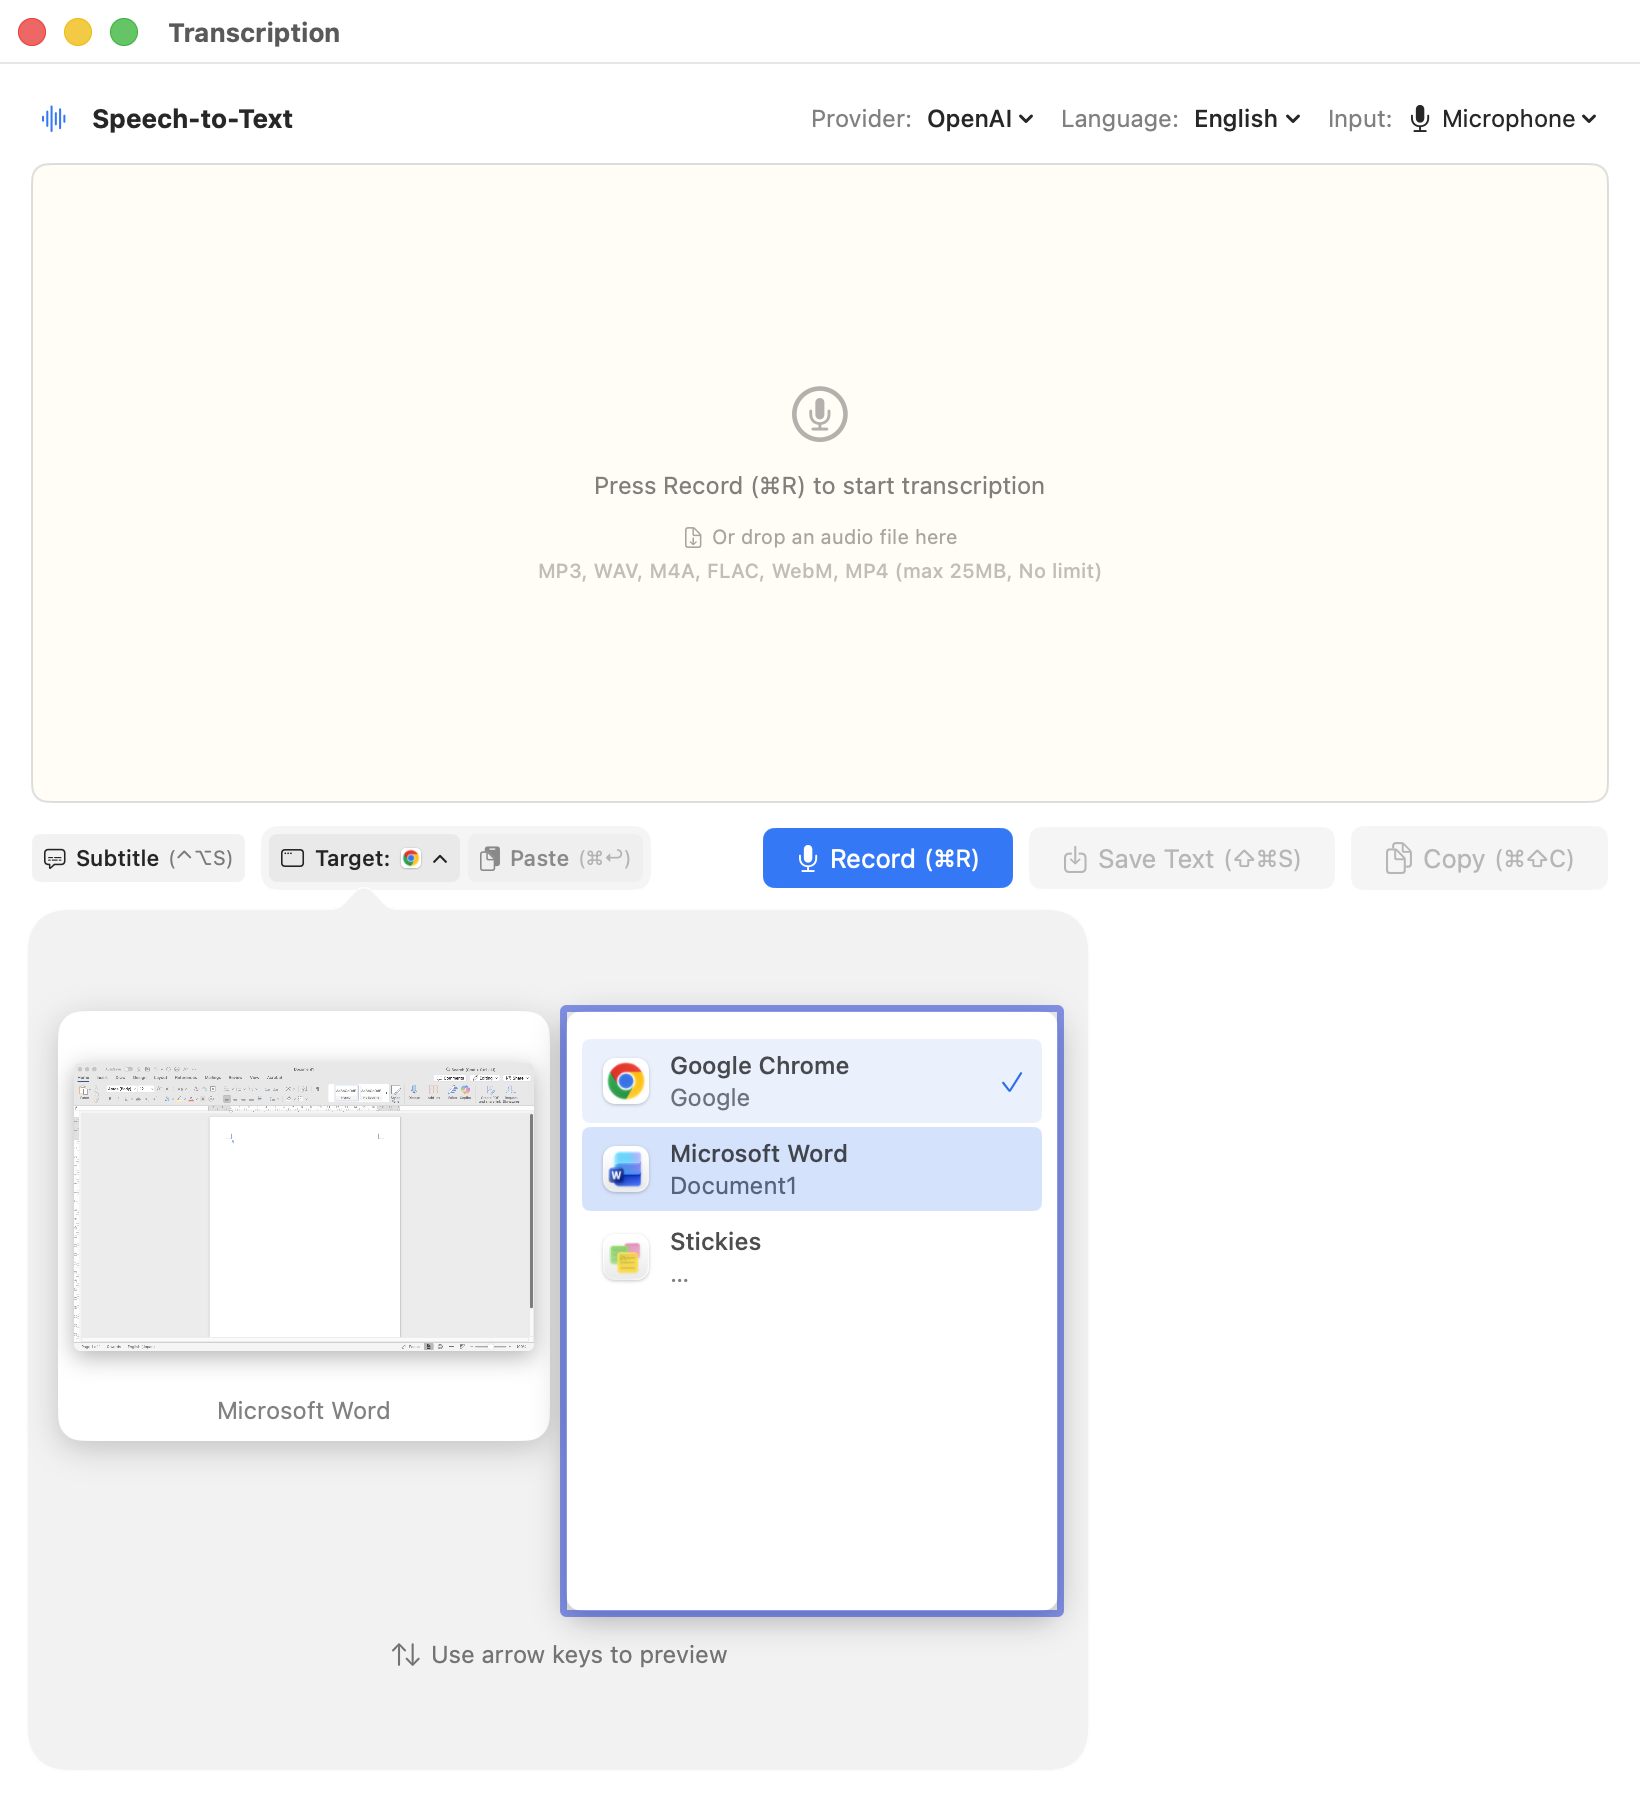
STT Panel
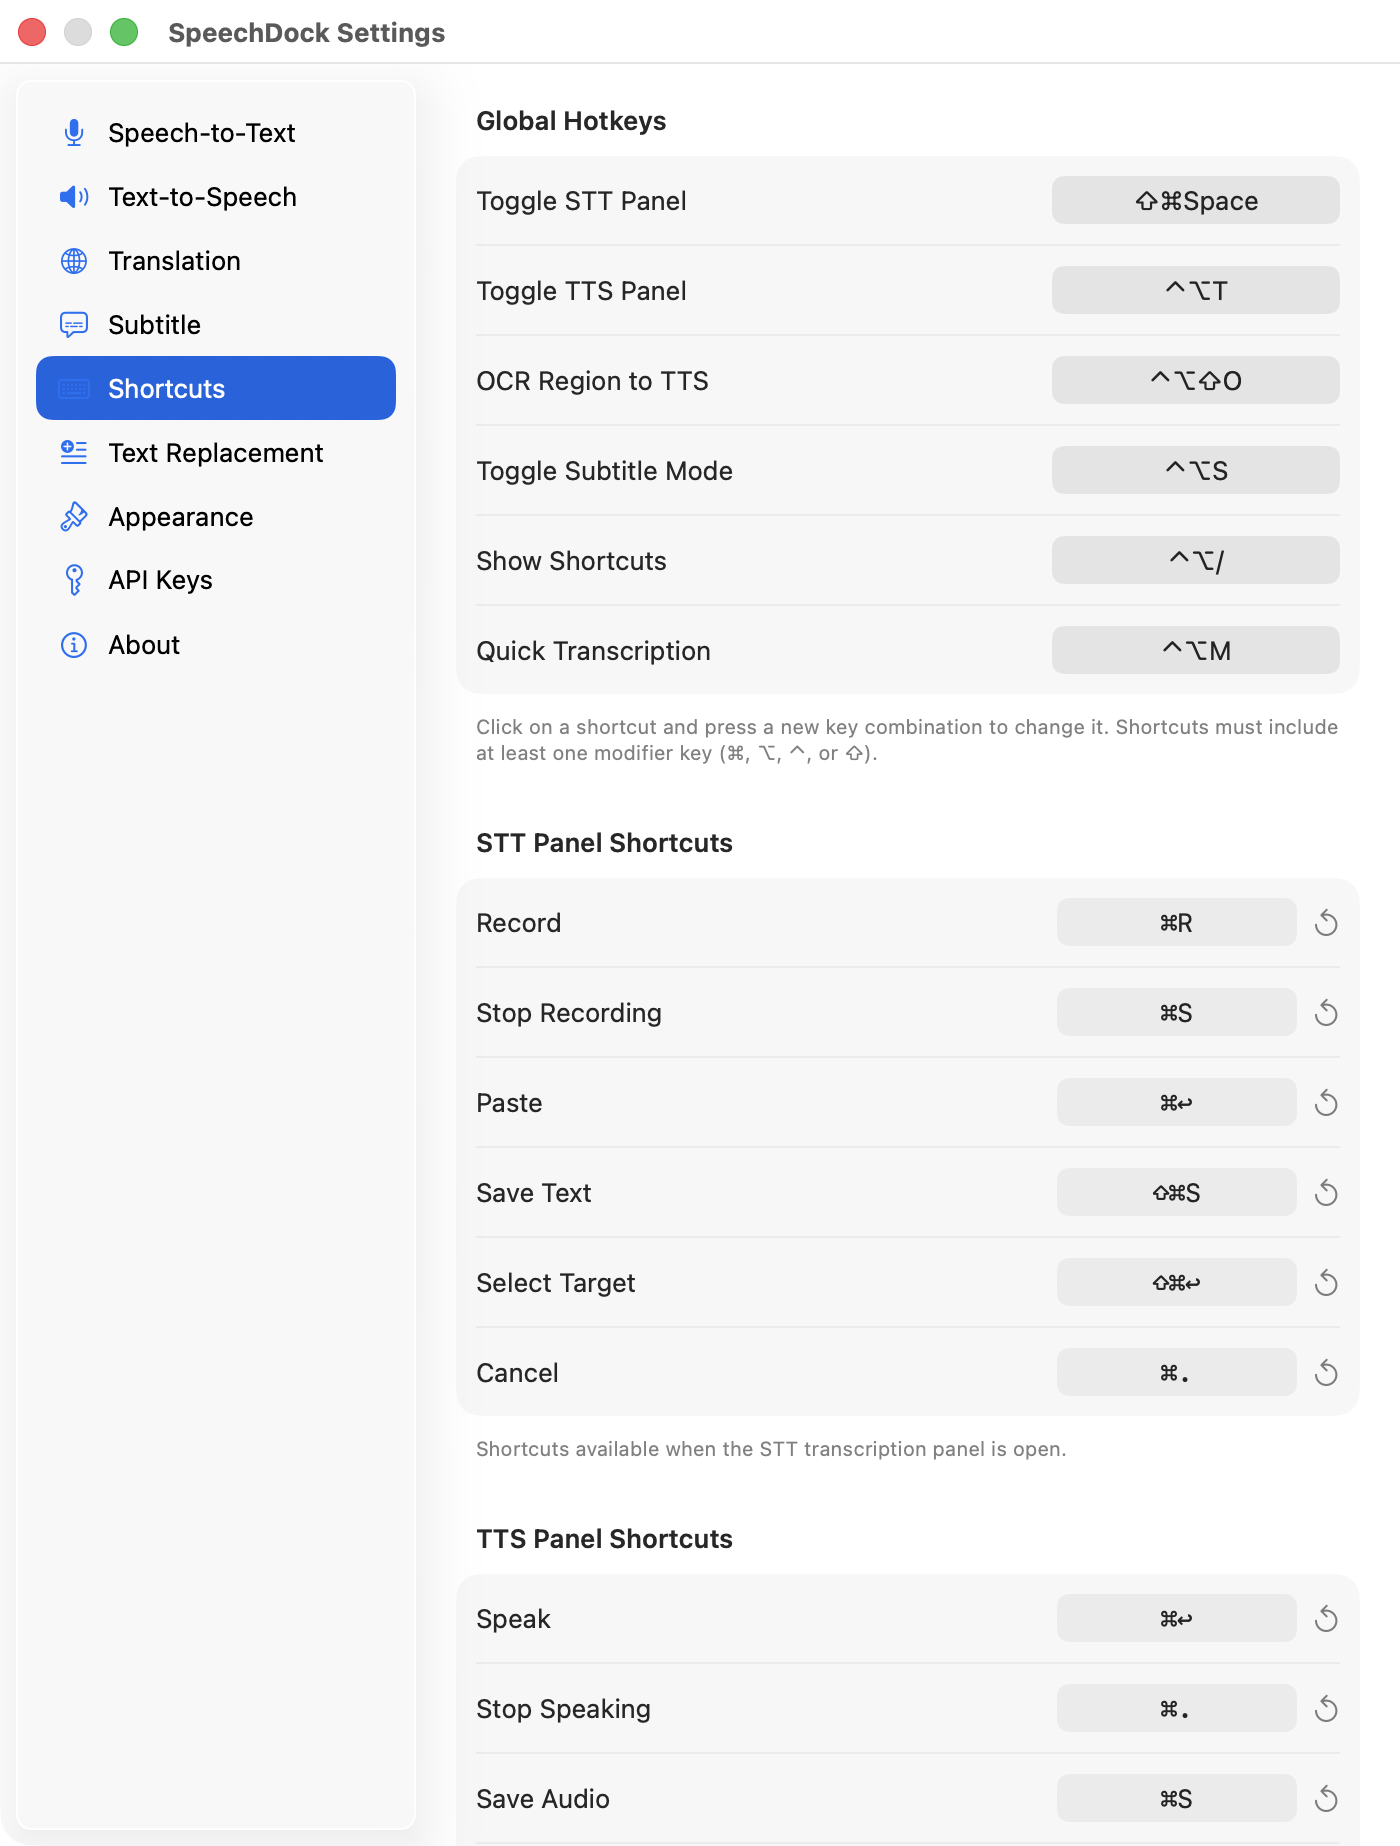
Open the STT panel with the global hotkey (default: Cmd + Shift + Space), or from the menu bar.
| Action | Shortcut |
|---|---|
| Record / Stop | Cmd + R / Cmd + S |
| Paste to Target | Cmd + Return |
| Select Paste Target | Cmd + Shift + Return |
| Cancel | Cmd + . |
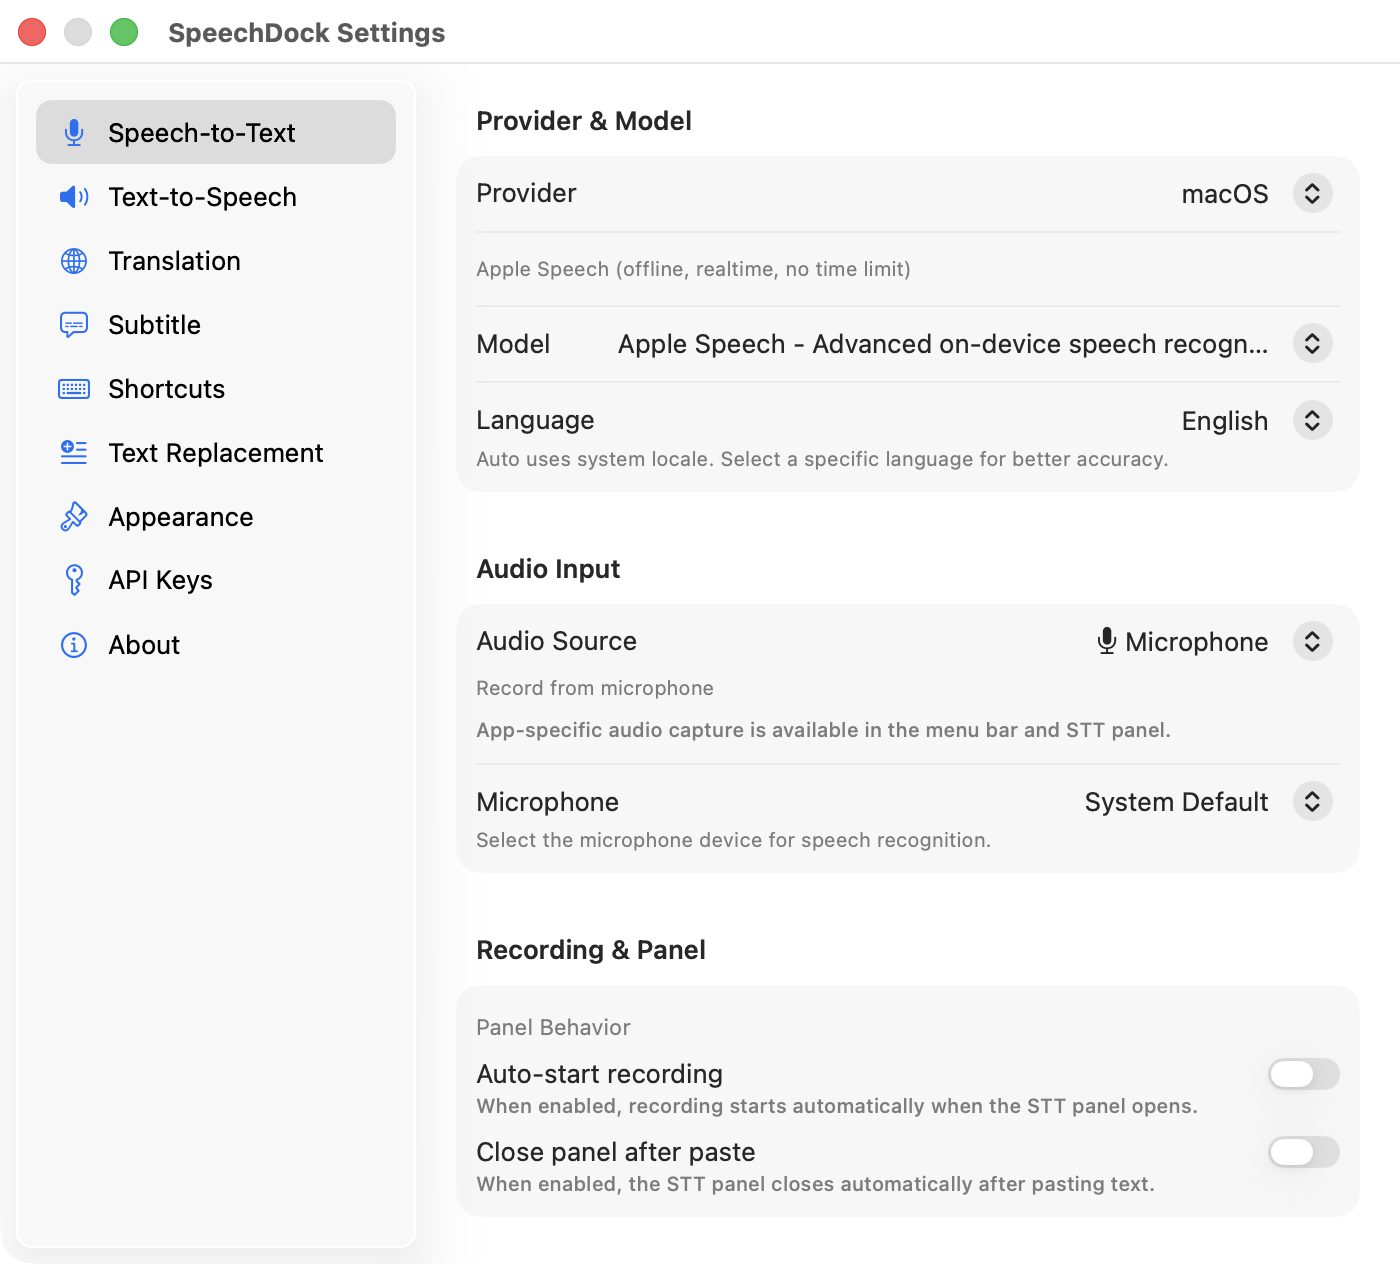
Auto-start Recording: When enabled in Settings, the STT panel starts recording immediately when opened.
VAD (Voice Activity Detection)
Automatically stops recording when silence is detected:
- Minimum recording time: How long to record before VAD activates (default: 10 seconds)
- Silence duration: How long silence lasts before stopping (default: 3 seconds)
Configure in Settings > Speech-to-Text.
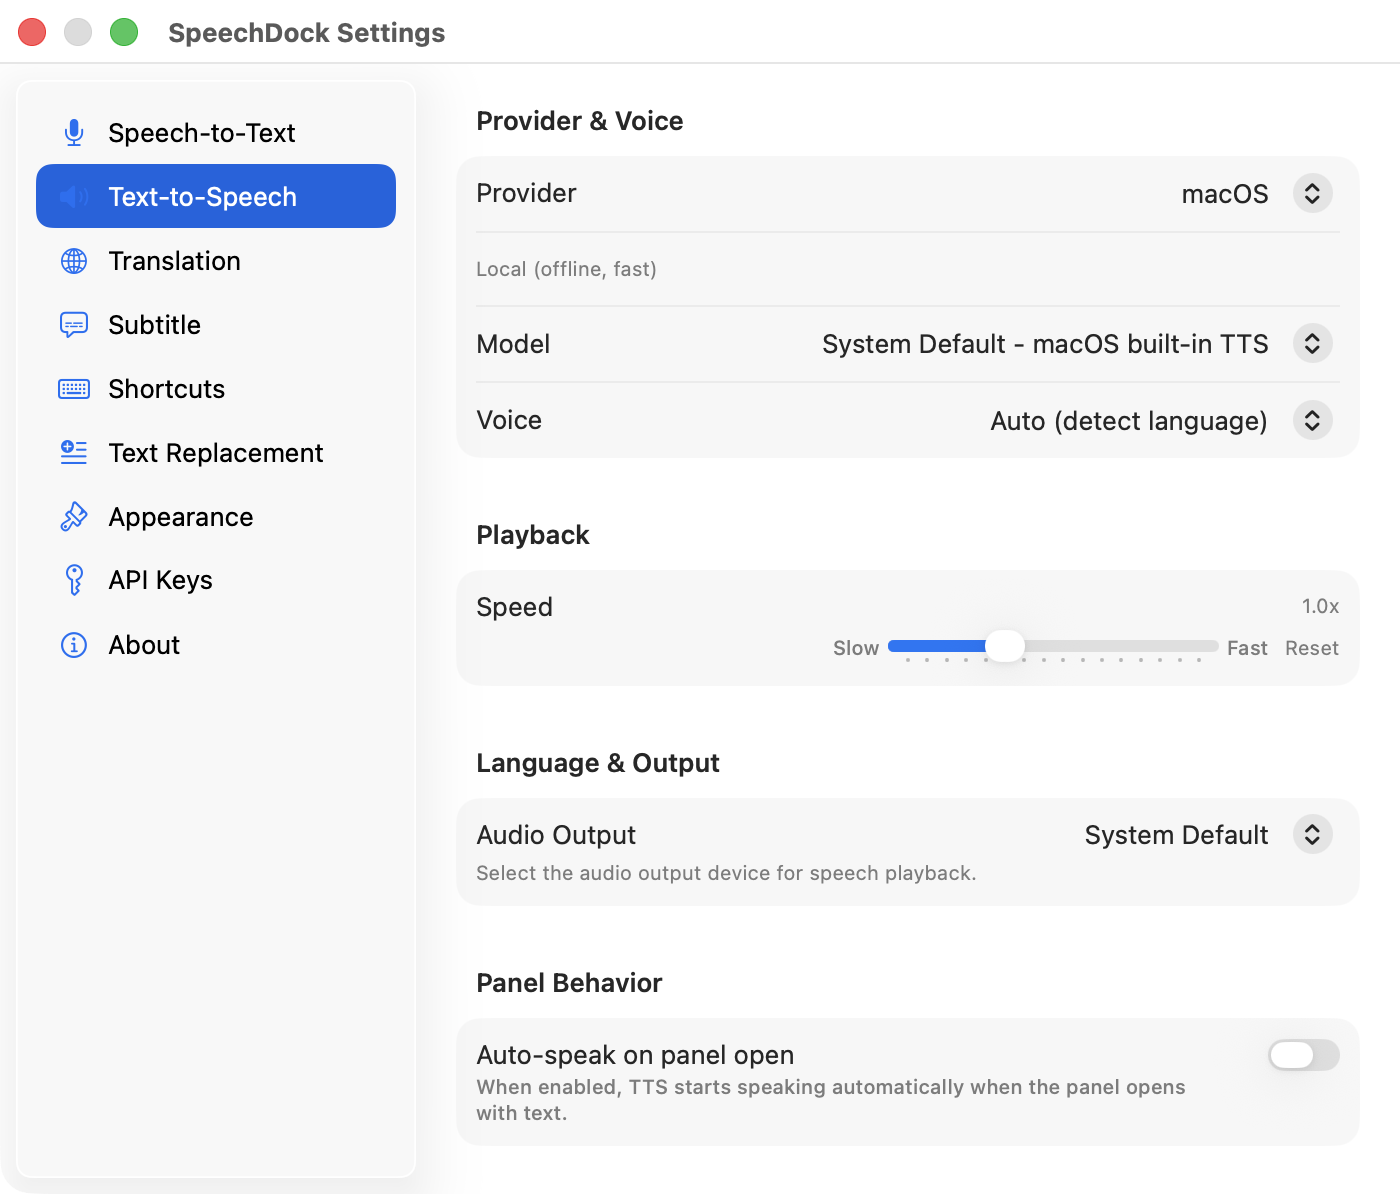
Text-to-Speech (TTS)
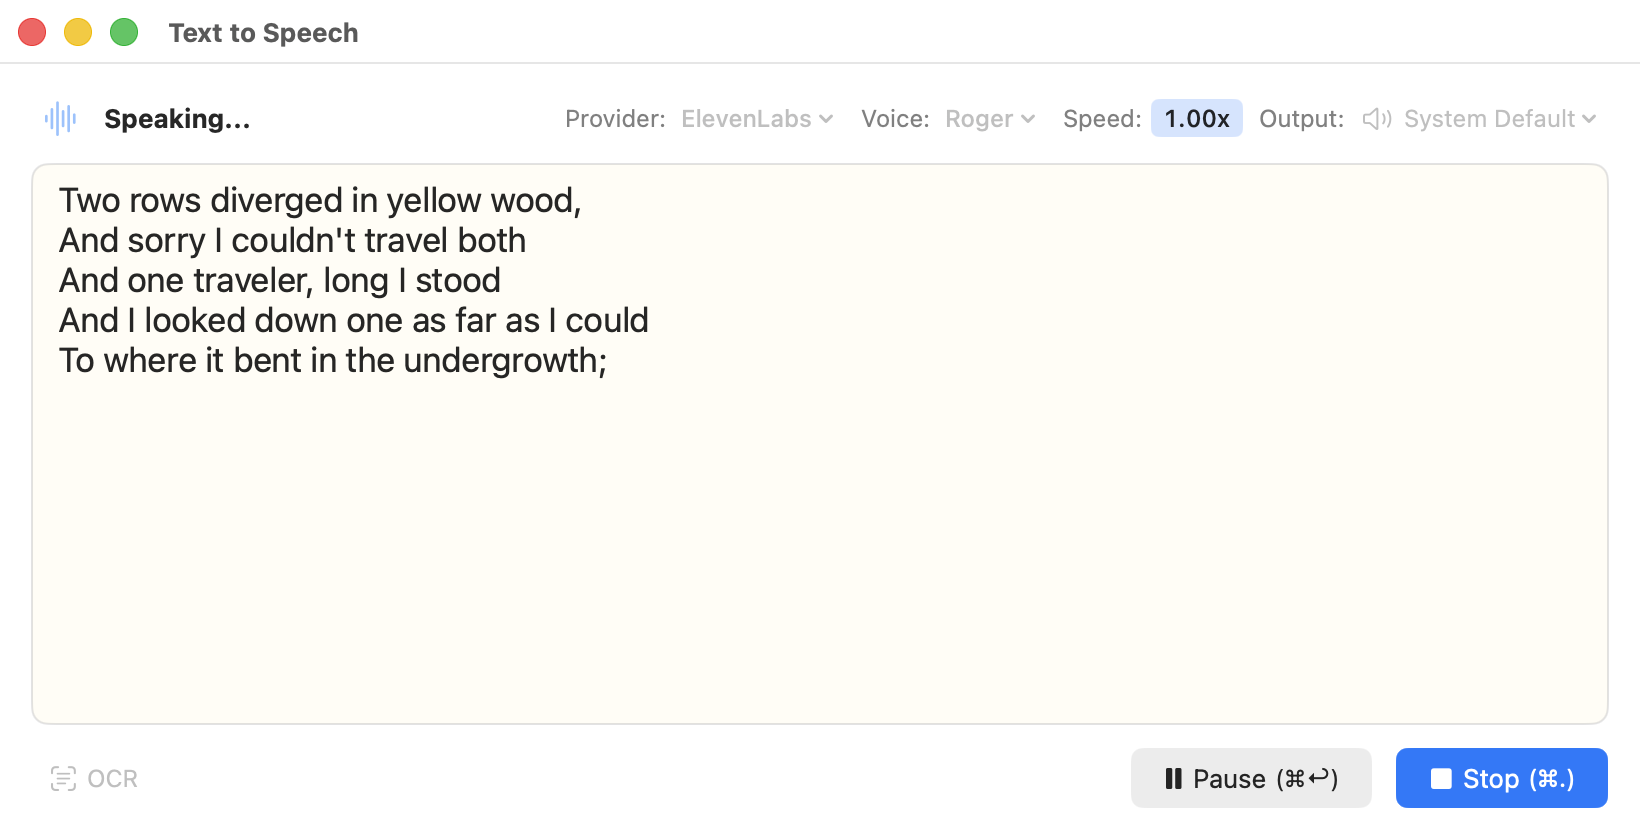
Convert text to speech using the built-in macOS speech synthesis. No API keys required.
TTS Panel
Open the TTS panel with the global hotkey (default: Ctrl + Option + T), or from the menu bar.
| Action | Shortcut |
|---|---|
| Speak / Stop | Cmd + Return / Cmd + . |
| Save Audio | Cmd + S |
Input methods:
- Type text directly in the panel
- Select text in another app, then press the TTS hotkey (auto-captures selected text)
- Use OCR to capture text from the screen
Auto-speak: When enabled, automatically starts speaking the captured text when the panel opens.
Speed Control
Adjust playback speed from 0.5x to 2.0x using the slider in the TTS panel. Speed changes apply in real-time during playback.
Save Audio
Save synthesized audio to a file by pressing Cmd + S or clicking the Save button. The text must be at least 5 characters long.
OCR to Speech

Capture text from any screen region and send it to the TTS panel:
- Press the OCR hotkey (default:
Ctrl + Option + Shift + O) - Drag to select the region containing text
- Recognized text appears in the TTS panel
- Edit if needed, then press Speak
Uses the macOS Vision Framework for text recognition.
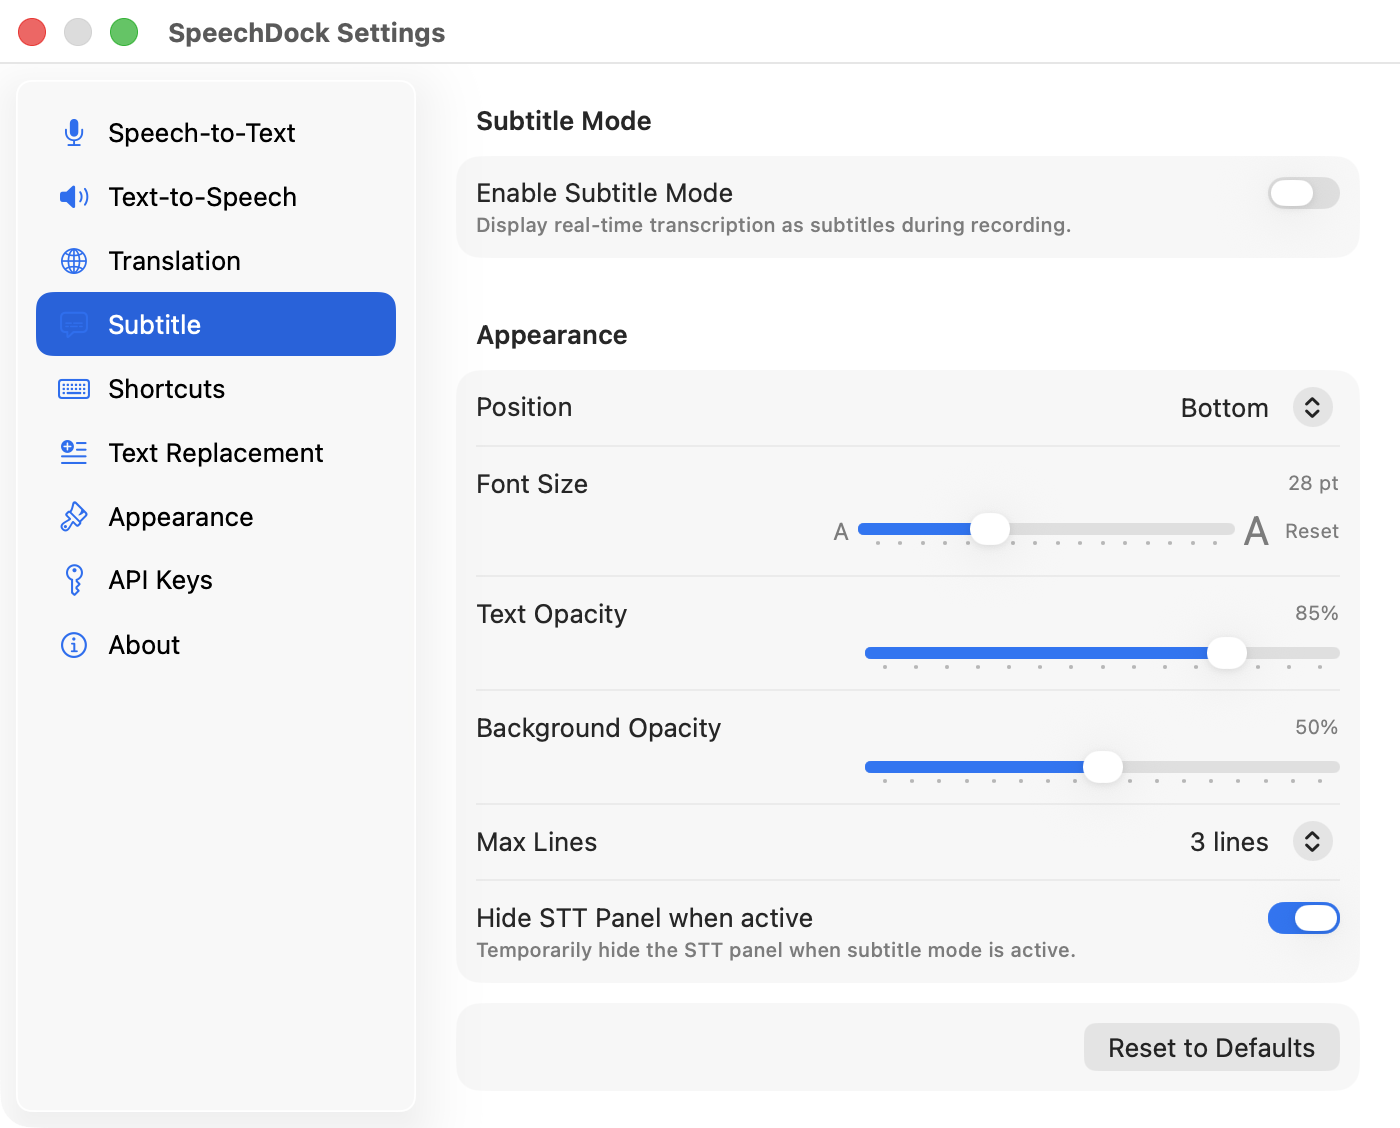
Subtitle Mode

Display real-time transcription as a floating subtitle overlay:
- Floating subtitles — Appears on top of all windows
- Click-through — Doesn’t interfere with your work
- Customizable — Font size, opacity, max lines, position
- Draggable — Position anywhere on screen
- Real-time translation — Optionally translate subtitles as you speak
Toggle with hotkey (default: Ctrl + Option + S), from the STT panel, or from the menu bar.
Subtitles show only the current recording session’s transcription. Previous sessions are not displayed.
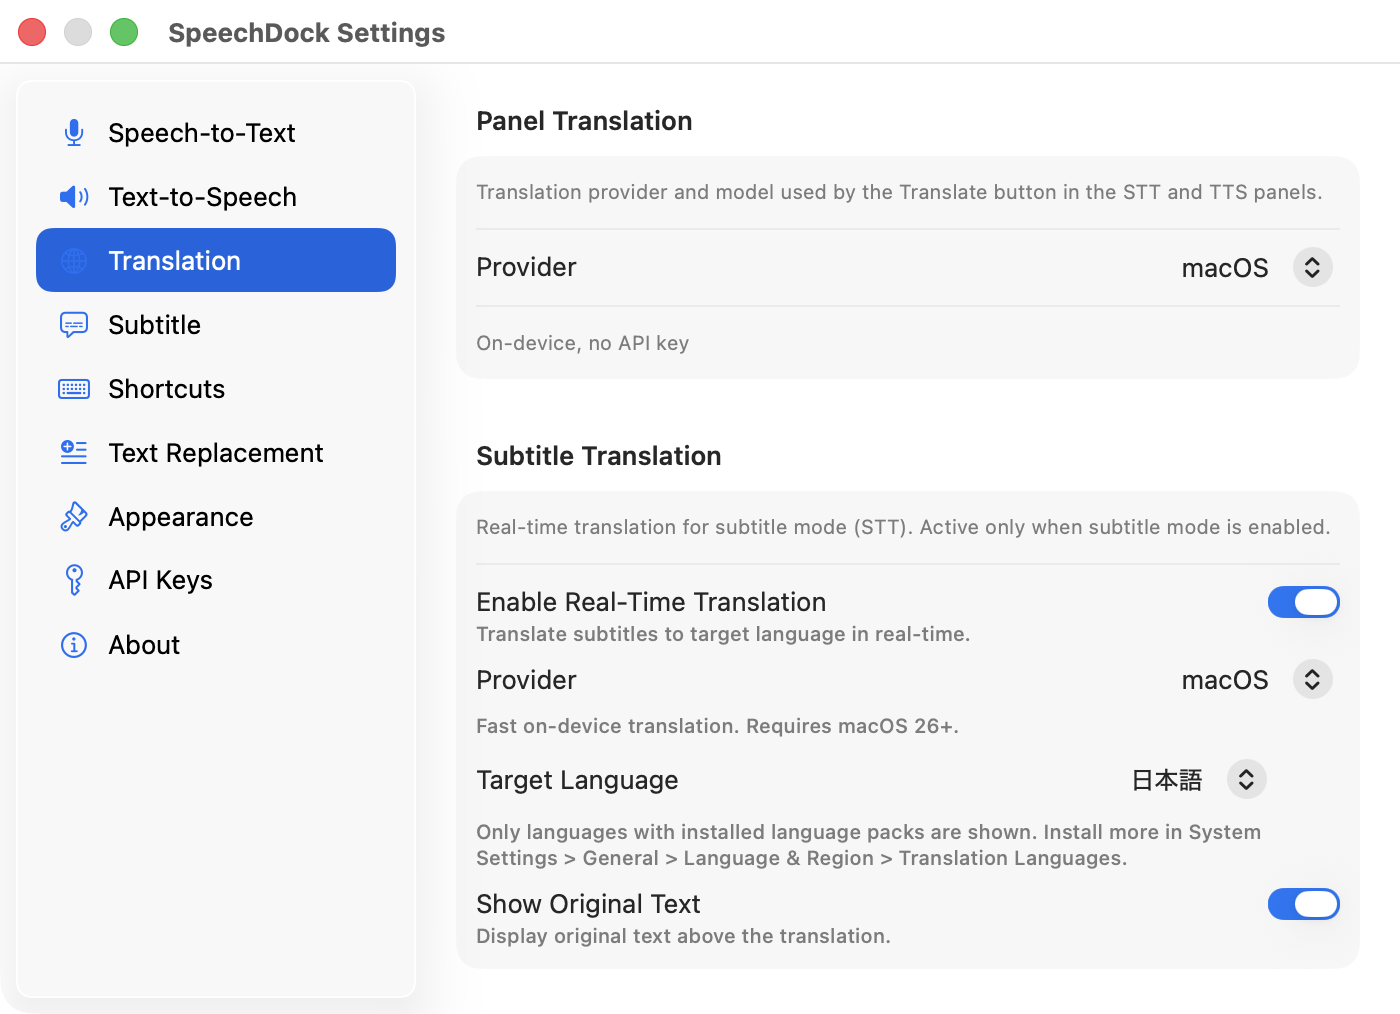
Subtitle Translation
Enable real-time translation directly in the subtitle overlay:
- Click the globe icon (🌐) in the subtitle header to enable translation
- Select target language and provider from the dropdown menus
- Translated text appears below the original transcription
Translation settings are synced from the STT panel when subtitle mode starts. You can change them independently in the subtitle overlay.
Quick Transcription

A floating microphone button for instant voice input without opening the STT panel. Perfect for quick dictation into any application.
How to Use
- Enable Floating Mic Button from the menu bar
- Click the button or press
Ctrl + Option + Mto start recording - Speak — real-time transcription appears in a floating HUD next to the button
- Click again or press
Ctrl + Option + Mto stop - Transcribed text is automatically pasted into the frontmost app
Features
- Floating button — 48px round button, always visible on screen
- Draggable — Drag to any position; position is saved between sessions
- Real-time HUD — Shows transcription text as you speak
- Auto-paste — Transcribed text is pasted when recording stops
- Context menu — Right-click to switch STT provider or hide the button
Button States
| State | Appearance |
|---|---|
| Idle | Gray button with mic icon |
| Hover | Accent color |
| Recording | Red with pulse animation, stop icon |
The button tooltip shows the current shortcut and recording duration.
Translation
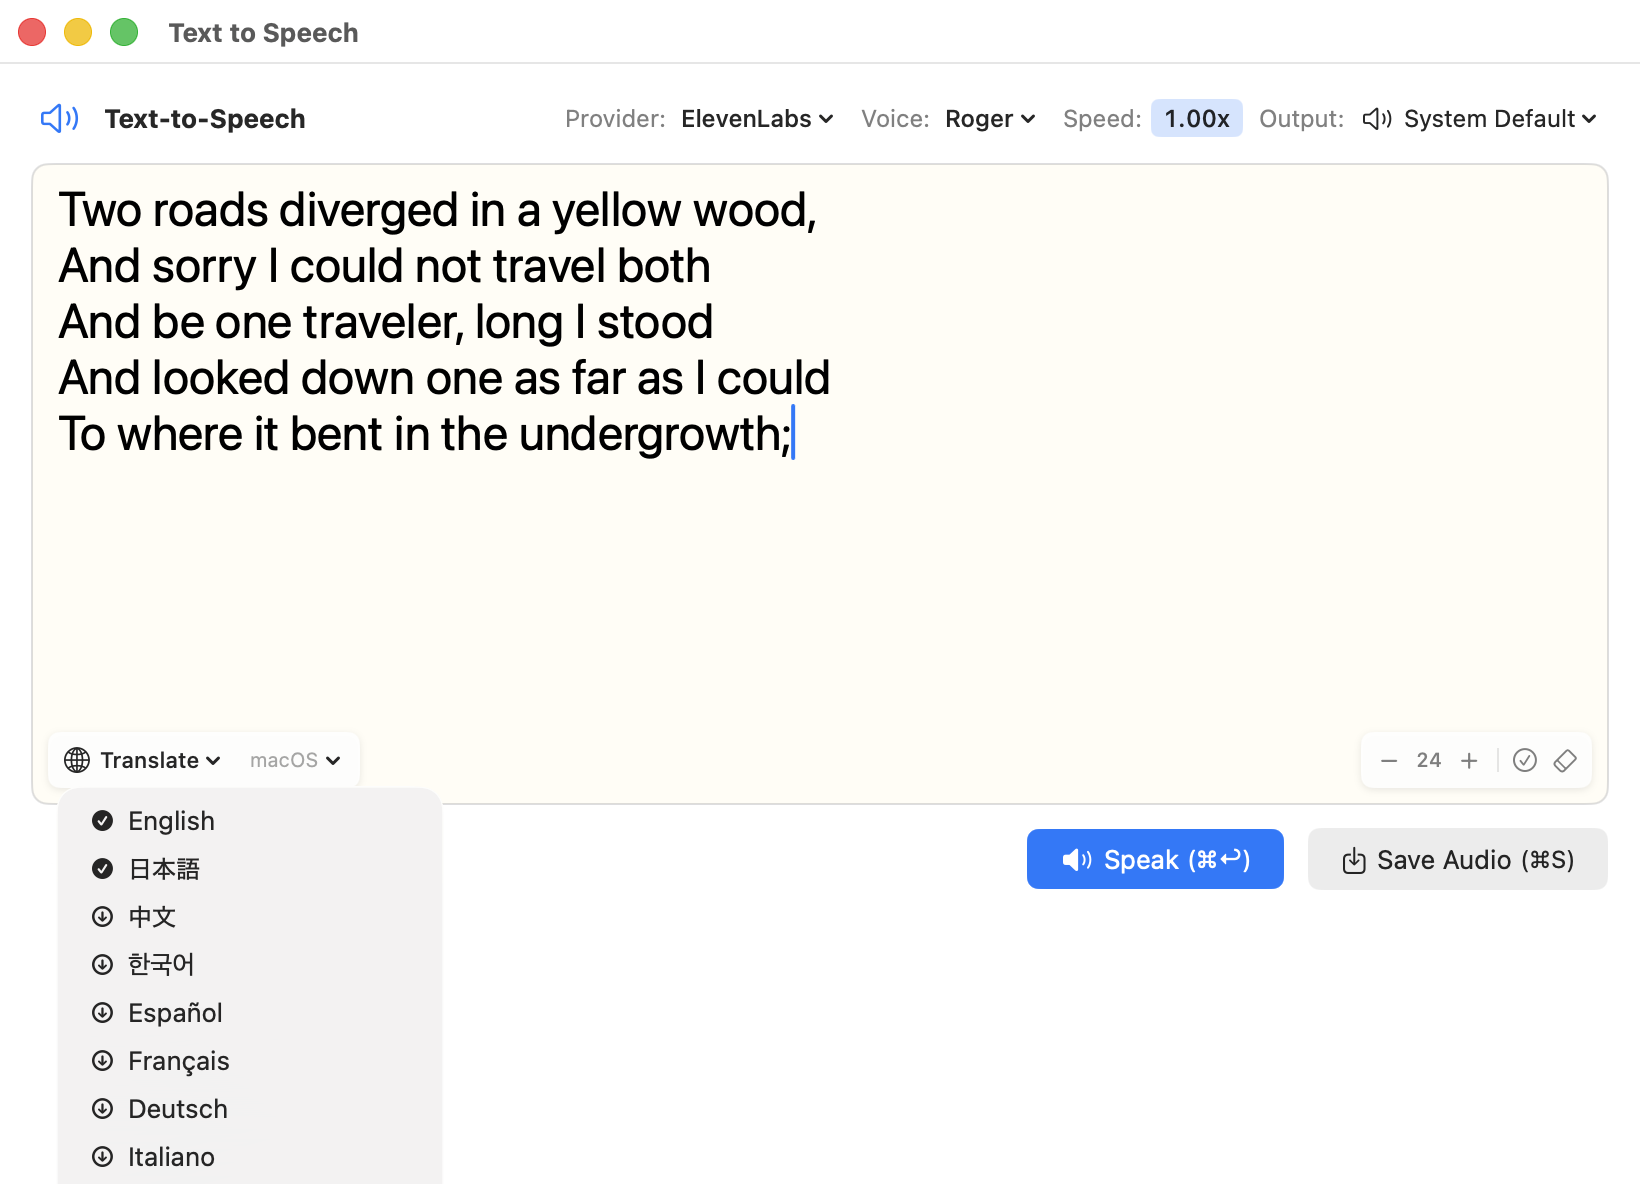
Translate transcribed or TTS text using macOS on-device translation (macOS 26+ required). No API keys needed; supports approximately 18 languages.
How to Use
- Enter or transcribe text in the STT or TTS panel
- Select the target language from the language dropdown (e.g.,
→ Japanese ▼) - Click
[🌐 Translate]to translate the text - Click
[🌐 Original ◀]to revert to the original text
The translation controls appear when text is 3 or more characters and no recording/speaking is in progress. Language selection and translation execution are separate actions, so you can change the target language without triggering translation.
TTS Language Sync: When you translate text, the TTS language automatically switches to match the translation target. Reverting to the original restores the previous TTS language.
For more translation options (100+ languages, higher quality), see Advanced Features.
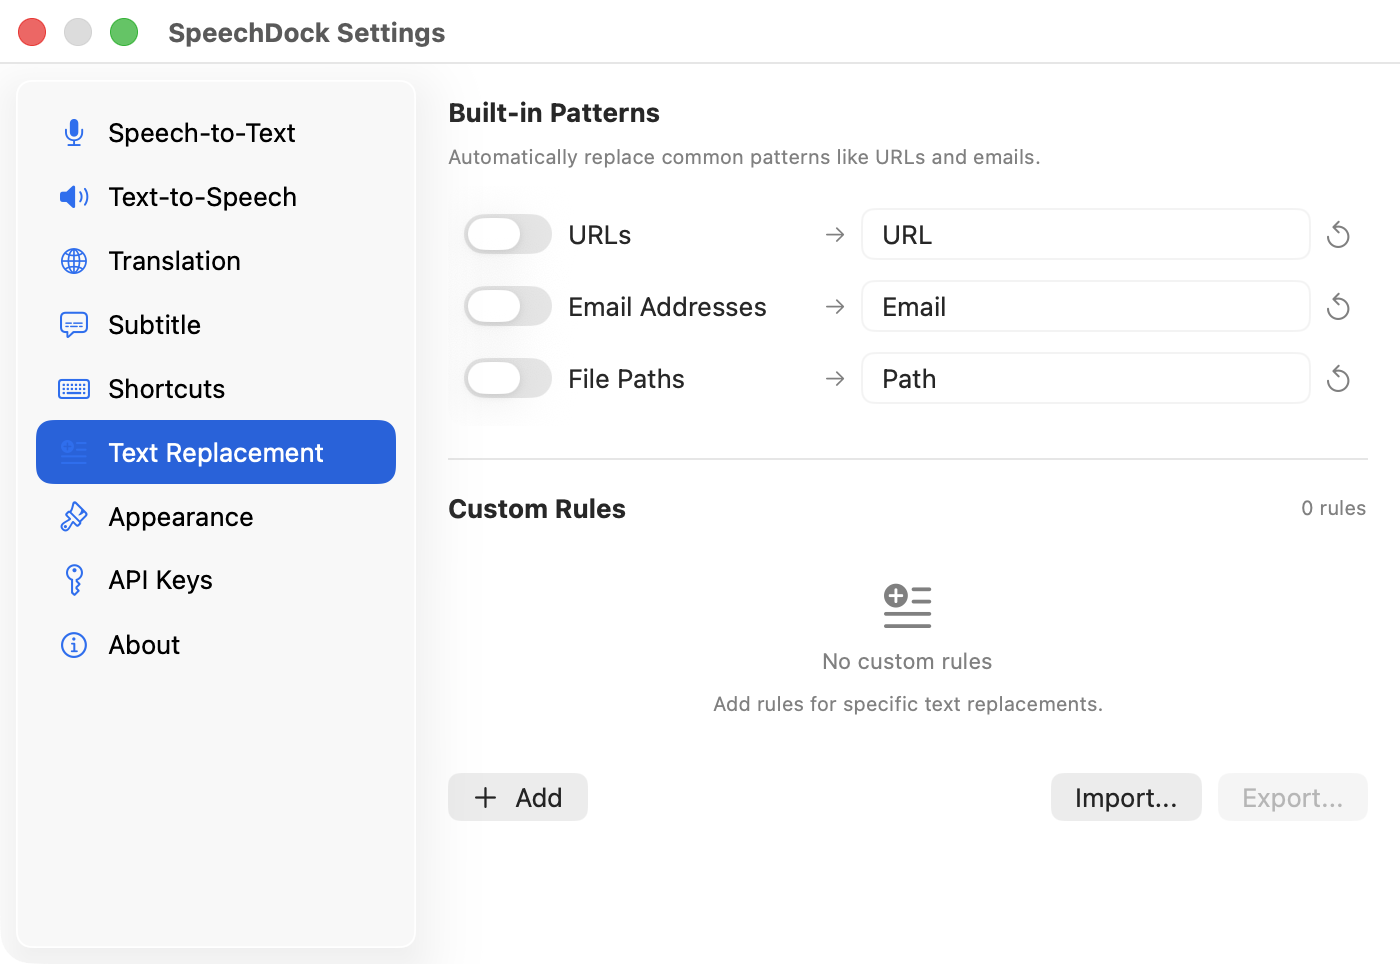
Text Replacement
Define rules to automatically correct or replace patterns in STT output or TTS input.
Built-in Patterns
| Pattern | Example | Default Replacement |
|---|---|---|
| URLs | https://example.com | ” URL “ |
user@example.com | ” Email “ | |
| File Paths | /path/to/file | ” Path “ |
Each pattern can be toggled on/off with customizable replacement text.
Custom Rules
Add your own regex-based replacement rules in Settings > Text Replacement. Rules can be exported/imported as JSON files.
In the TTS panel, matched text is highlighted with an orange underline and tooltip.
Keyboard Shortcuts
Global Hotkeys
| Action | Default |
|---|---|
| Toggle STT Panel | Cmd + Shift + Space |
| Toggle TTS Panel | Ctrl + Option + T |
| OCR Region to Speech | Ctrl + Option + Shift + O |
| Toggle Subtitle Mode | Ctrl + Option + S |
| Quick Transcription | Ctrl + Option + M |
Customize in Settings > Shortcuts.
Press ? in any panel to display the keyboard shortcuts cheat sheet:
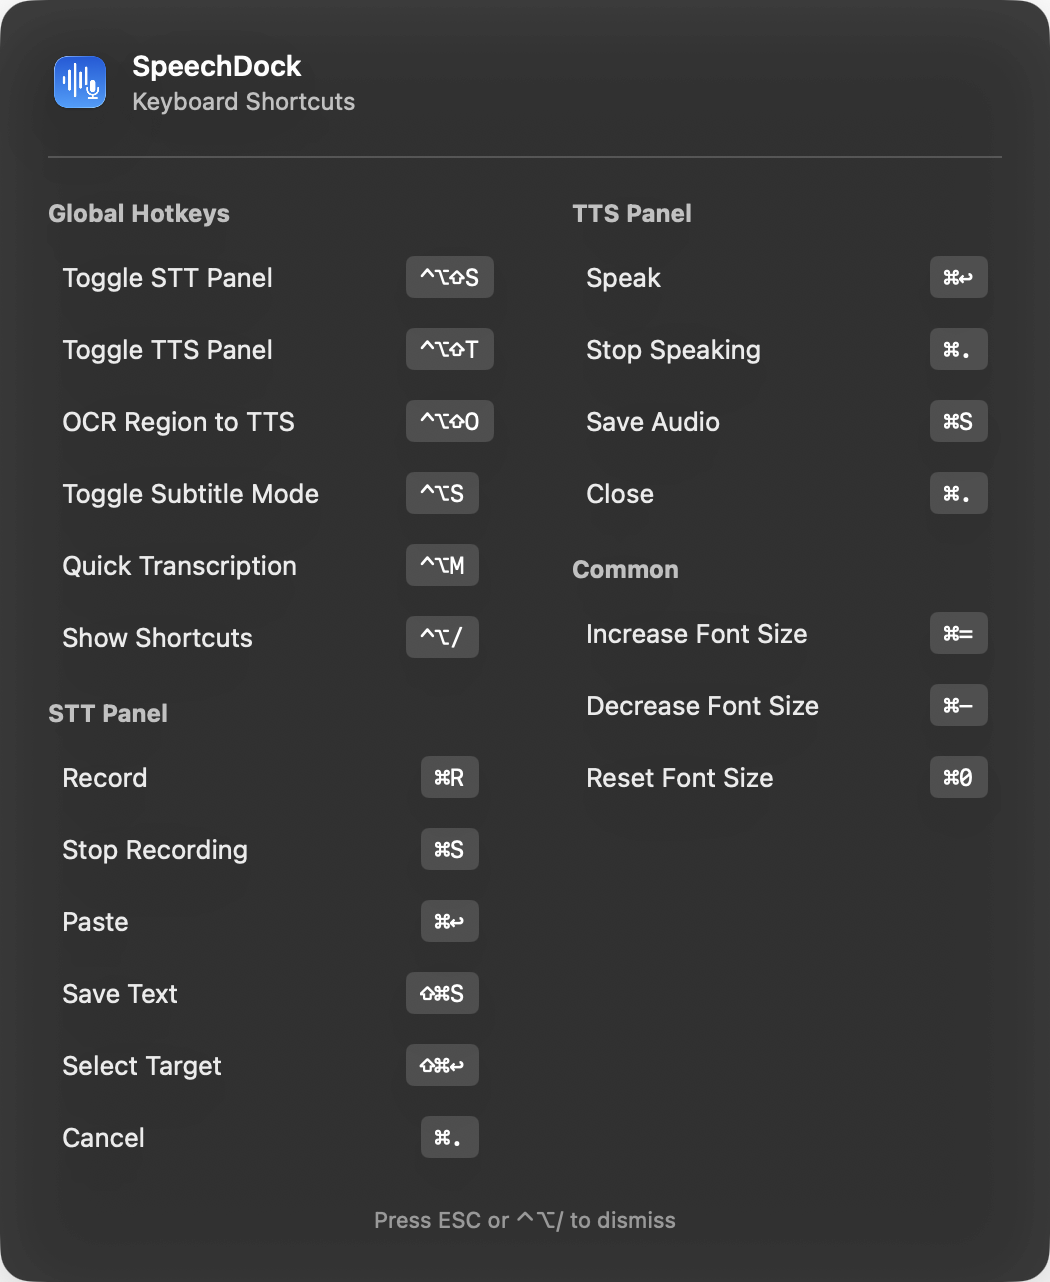
Panel Shortcuts
Panel shortcuts can be customized with modifier key support in Settings > Shortcuts.
Panel Style
Choose in Settings > Appearance:
- Floating — Always-on-top borderless panel, draggable from anywhere
- Standard Window — Regular macOS window with title bar
Only one panel (STT or TTS) can be open at a time. Opening one closes the other.
Menu Bar
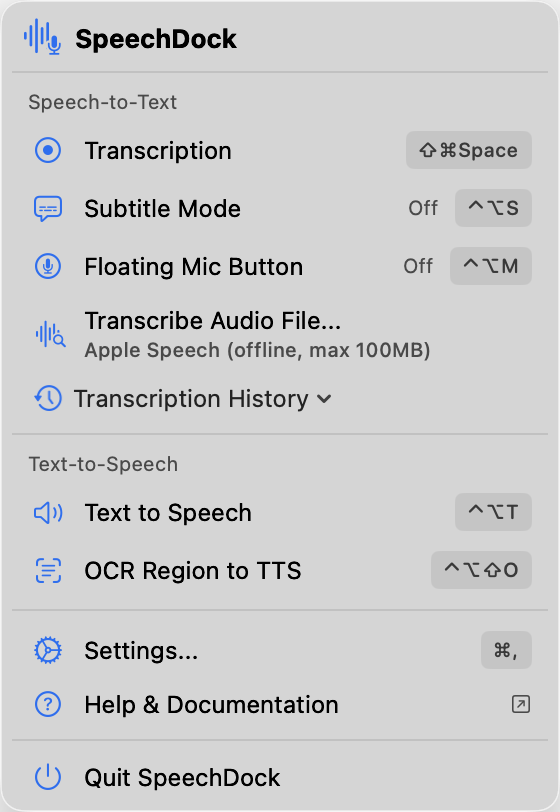
Click the SpeechDock icon in the menu bar for quick access to:
- Start/stop STT recording
- Open TTS for selected text
- Toggle subtitle mode and floating mic button
- Transcribe audio files
- Open transcription history
- OCR to speech
- Access Settings, Help, and About
Settings
Open Settings with Cmd + , or from the menu bar. The unified settings window uses a sidebar with the following categories:

For API key settings, see Advanced Features.
Privacy & Security
- macOS Native: All audio processed on-device. No data sent externally.
- API Keys: Stored in macOS Keychain, never transmitted except to the respective provider.
- No Telemetry: SpeechDock does not collect or transmit usage data.
Troubleshooting
STT not working
- Check Microphone permission is granted
- For System/App Audio, check Screen Recording permission
- Try restarting the app
TTS not working
- Check audio output is not muted
- Try selecting a different output device
- Try restarting the app
Shortcuts not responding
- Check Accessibility permission is granted
- Look for conflicts with other applications
- Reset shortcuts to defaults in Settings
OCR not working
- Check Screen Recording permission is granted
- Try selecting a larger region with clearer text
| Previous: Home | Next: Advanced Features |